I fell into the blondie chasm while running tests for my perfect brownie. I’d just finished testing cocoa based brownies and was about to move on to melted chocolate – but then my Sídhe asked me to make blondies for Bealtaine and I always say yes to their requests. A few iterations later, I’m questioning whether a blondie is actually a better archetype than a brownie.
Eventually I’ll move on to chocolate based brownies as planned, but after much ado I’m running low on chocolate, so brownies will have to wait until my restock order from Olive Nation arrives.
I started this process with Smitten Kitchen’s infinitely adaptable blondie, but the gram weights Deb listed in her recipe got lost in my mental translation, and then I adjusted the amount of butter. I will reiterate Deb’s basic instructions in my own language and modality – but to the research-minded reader, I would say it’s worth giving her post a read too.
Bar cookies are often made with walnuts or pecans in the USA. This recipe would certainly work with a more common nut. I wanted to use toasted pine nuts for their specific and unique flavor, which I feel goes *so* well with bittersweet chocolate and the rich buttery toffee flavor of the blondie base. But if pine nuts are not in your budget or you just don’t like how they taste (some people don’t!) then by all means replace them or omit the nuts altogether.
Ingredients (Type A)
- 60 grams pine nuts
- 80 grams finely chopped dark chocolate (I used Valrhona Manjari 65%)
- 142 grams unsalted cultured butter (I used Banner Butter)
- 200 grams dark brown sugar (I used Wholesome brand)
- 2 pinches Maldon salt (plus more for topping)
- 1 egg (I used Vital Farms regenerative)
- 100 g all-purpose flour (I used Red Tail Grains’ Miller’s Choice)
Ingredients (Type B)
- 1/2 cup chopped nuts
- 1/2 cup semi-sweet chocolate chips
- 1 stick + 2 tablespoons unsalted butter
- 1 cup packed brown sugar
- 2 pinches Maldon salt (plus more for topping)
- 1 egg
- Scant 1 cup all-purpose flour
(Type A only) On chocolate
I use bar or fève chocolate instead of chips because chips contain waxes that help them hold their shape. If you want the experience of your chocolate puddling out in its liquid form and imbuing the batter, you have to use a wax-free chocolate. Read the ingredient labels!
My house chocolate is Valrhona Manjari (65%) because I’m partial to the borderland territory between semisweet and bittersweet chocolates. This is the darkest I’ll really go, but it’s actually really sweet. If you’re a real chocolate person (something I could never claim myself), pine nuts can stand up to a lot of cacao, you can go as high as 85%.
I left my chocolate in larger chunks for one batch of blondies and cut it very finely for the next, and I preferred the finer cut; it suits the size of the pine nuts. I also found that a finer chop makes the whole thing easier on the teeth, especially when stored in the fridge.
Toasting the nuts
Some people would say toasting nuts is optional, but I would say it’s actually essential to the deeply caramelized profile I imagine in a blondie. If your palate is easily overwhelmed, that’s the only reason I would recommend skipping this step.
Nuts burn very easily, so they need to be treated delicately. Toasting them is an exercise in patience, trust, and care.
If you’re using walnuts or other chonky boys, chop them before this step. We’re going for small, melt in your mouth pieces.
Set a bowl beside the stove to receive the nuts when they are hot and toasted.
Place the nuts in a small saucepan, and *then* set up the saucepan over low heat. My stove goes to 7 and for this I set it to 2. Hover over the stove with a spatula, and stir the nuts every 15-20 seconds, even if it looks like nothing is happening.
After a few minutes of this, you will start to see the nuts releasing their oils. They may begin to make very small bubbles and a sizzling sound. At this point, increase the frequency of your stirring. Soon after the sizzling begins the nuts will start to brown, and it will happen quickly! Stay focused.
It will look like the nuts are toasting unevenly; that’s natural. When most of them are nicely golden and a few start looking brown, pour them into the bowl you prepared. Some of them will still be very blonde at this point. That’s okay.
I chopped my pine nuts finely after they cooled down because I wanted them to incorporate into the blondies almost like they were part of the flour mixture. But it’s not necessary.
Preparing the blondies
Preheat the oven to 350˚F / 175˚C.
For a single batch, use an 8×8 inch square pan or a 9 inch round pan. For a double batch, use a 9×13 inch pan.
Melt the butter in the same pan you toasted the nuts in. Using a pastry brush or a paper towel, take some of the melted butter and use it to grease your baking pan.
Measure the brown sugar into the mixing bowl. Add two pinches of Maldon salt, crumbling it as you can. Add the melted butter.
Add the egg and mix until all the liquids emulsify. At this point, if you want to add a dash of vanilla extract or bourbon or what have you, go ahead. Mix everything until it’s well combined.
Add the nuts, chocolate, and flour to the mixing bowl all at once and mix until no dry streaks remain.
Spread the batter in your pan (this may take some effort) and sprinkle Maldon salt generously over the top.
Bake for 18-22 minutes, or until the edges begin to set. The middle will look undercooked. (Deb says 20-25 mins, but in my tests, perhaps due to the nature of the pine nuts, they dried out rather quickly.)
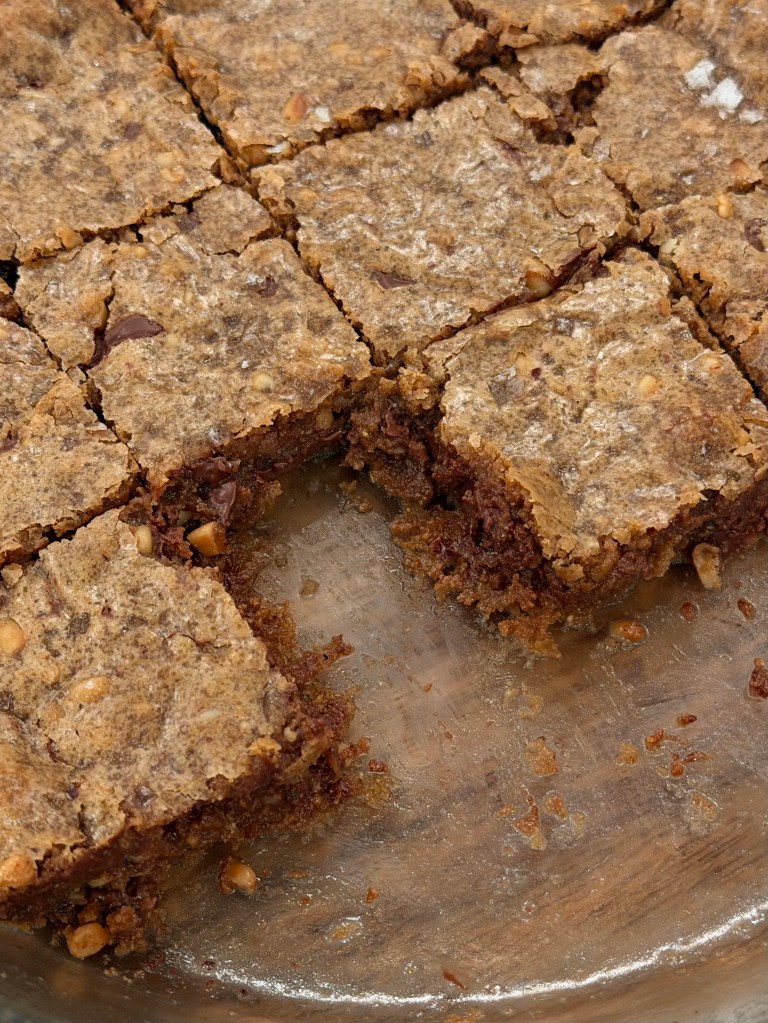
For the most optimal, caramelized, dense, chewy, and delectable results, cool the blondies to room temperature on the counter, and then chill fully in the fridge before slicing. I will say two things about this. First, please believe me – it makes an incredible difference. Second, in all seriousness I am not always patient enough to do this.

Leave a comment